Products
This section contains the product of the companies supported by the agent. In some cases, a product can be marked with different abbreviations depending on the language and ticket categories.
List of Products
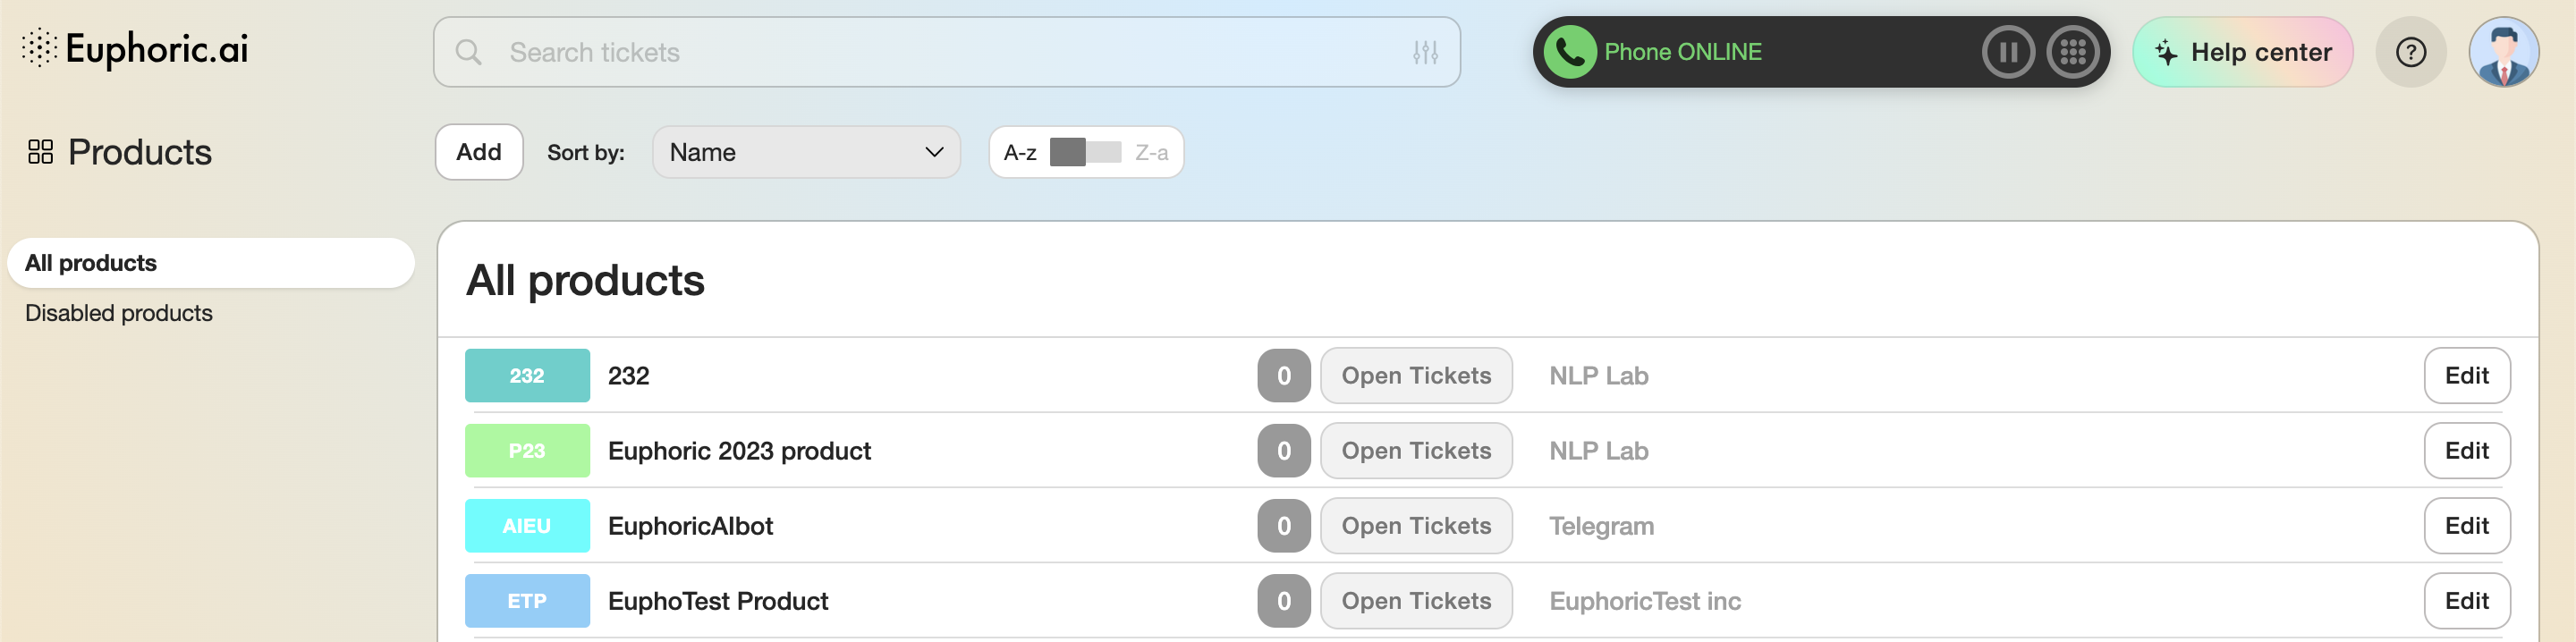
The lists can be sorted by name, company, date added, date modified, and by the amount of tickets, related to each product.
All products — all active products/ticket categories.
Disabled products — all products/categories that are no longer supported.
By clicking the full name of the product, the agent with the leader's role can get access to most of the ticket automation settings.
You can also create a new product by pressing the Add button under the Euphoric search field.
Product ID
 Each product has its unique ID which you can find in the last digits of URL in the product settings menu.
Product settings
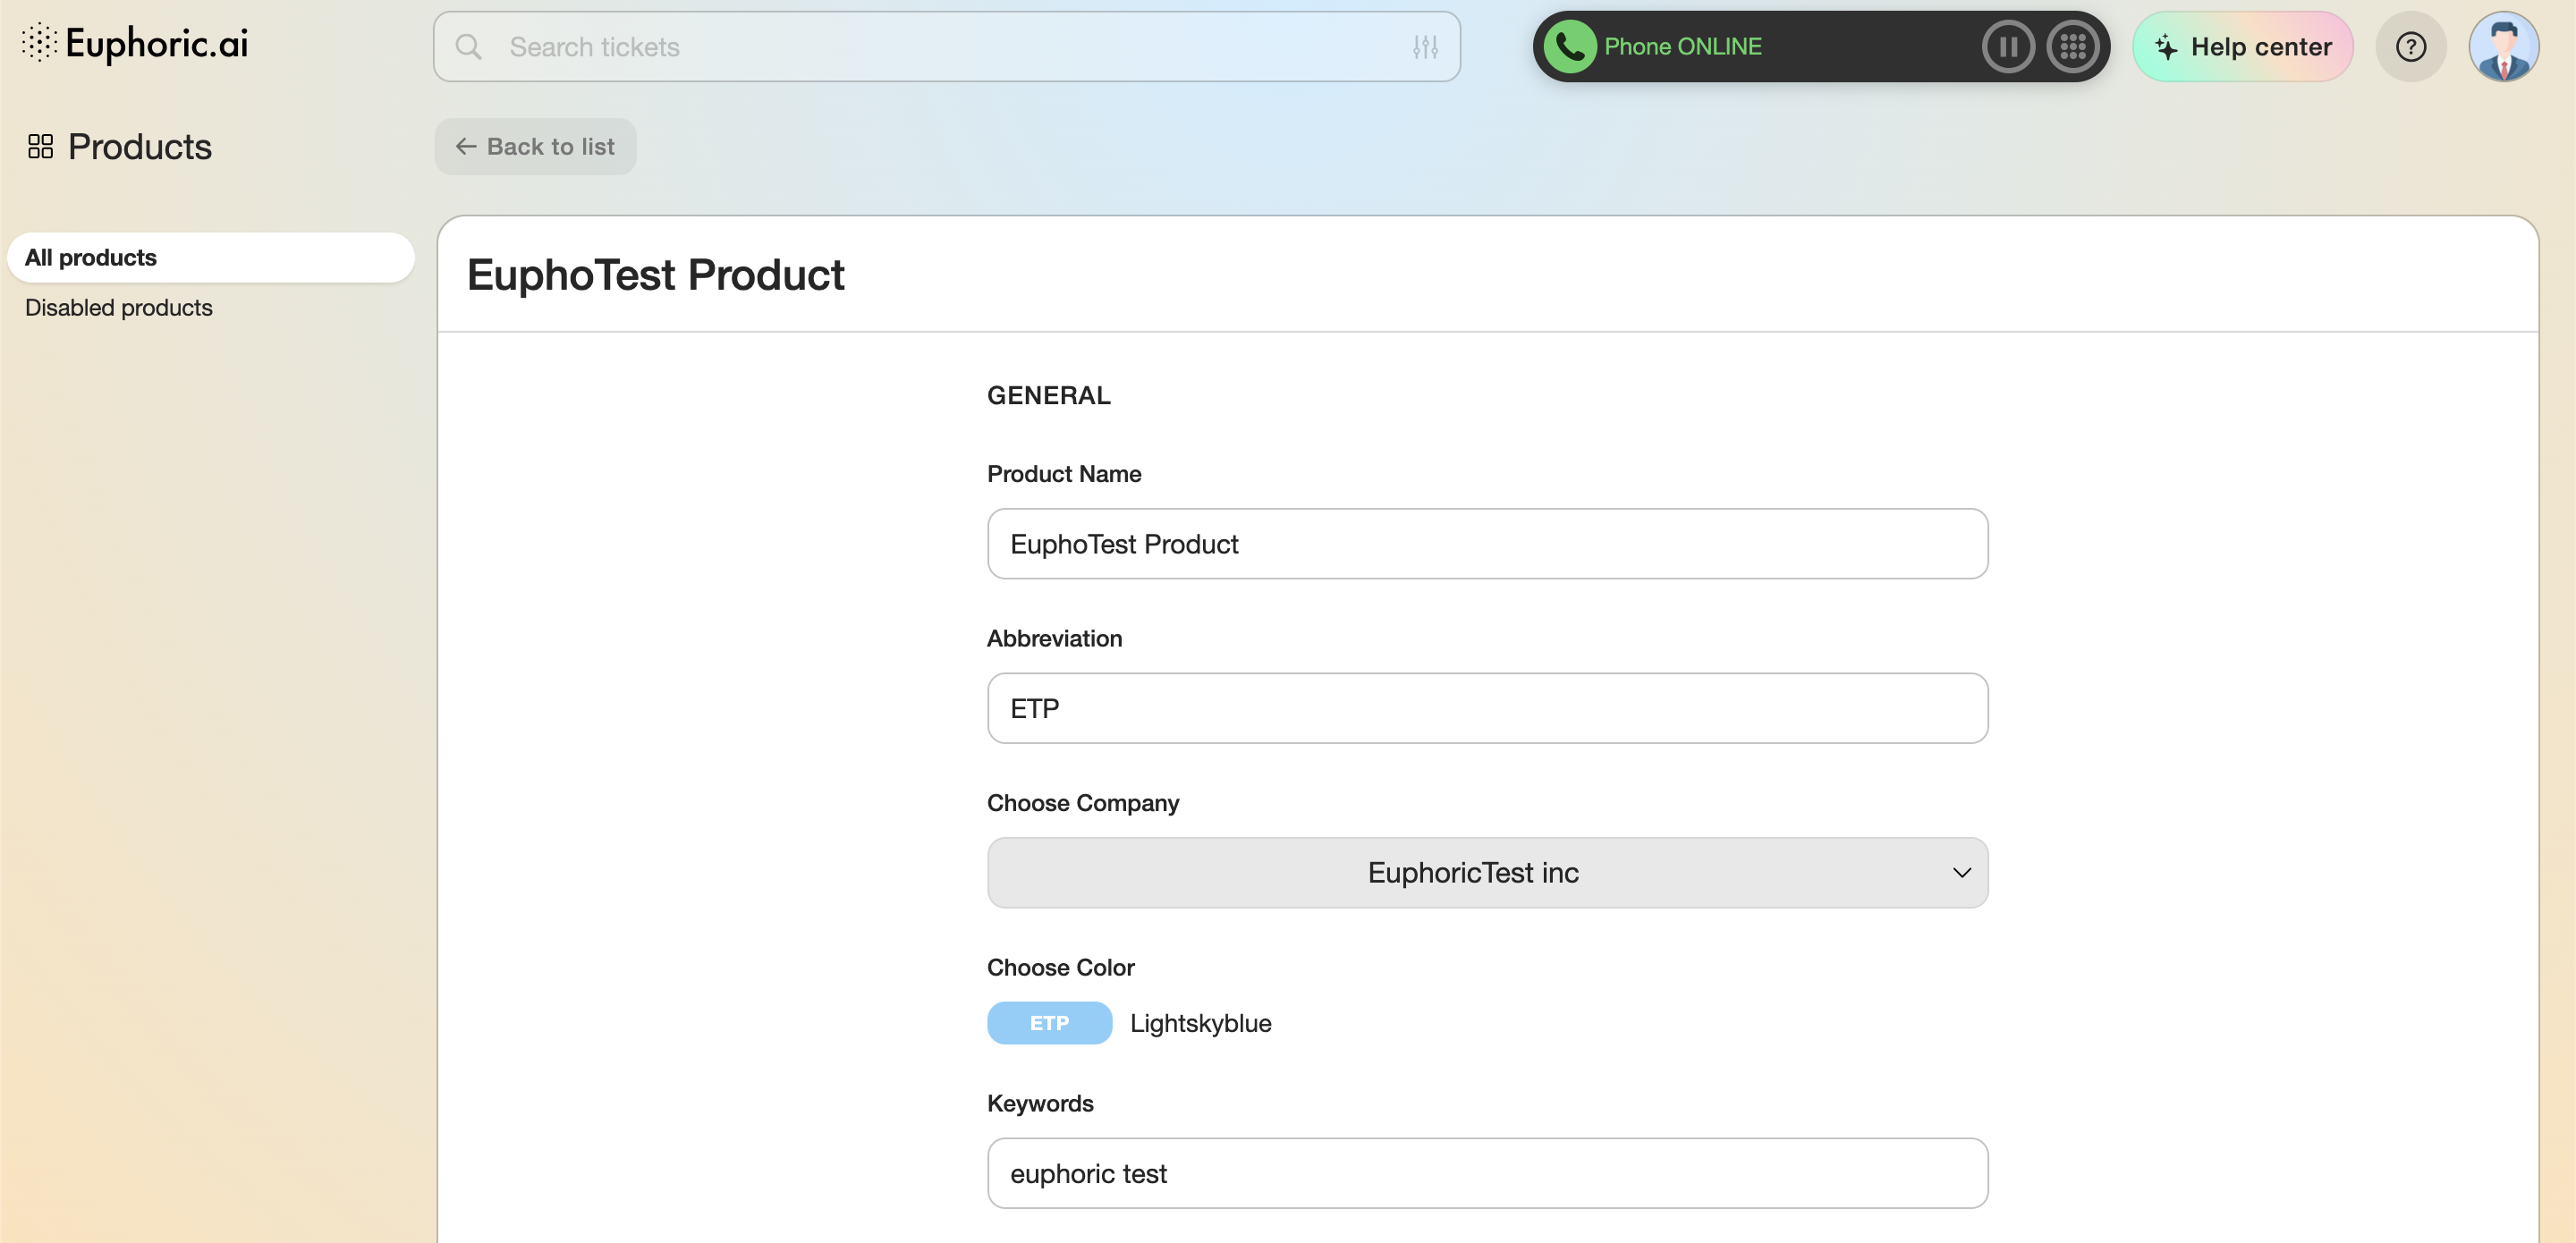
1. General
1.1. Product name. Product name editing.
1.2. Abbreviation. Abbreviation editing.
1.3. Choose company. Selecting the company that owns the product (the “Companies” category in the list on the left).
1.4. Choose color. Product icon color settings.
1.5. Keywords. Keywords/tags editing.
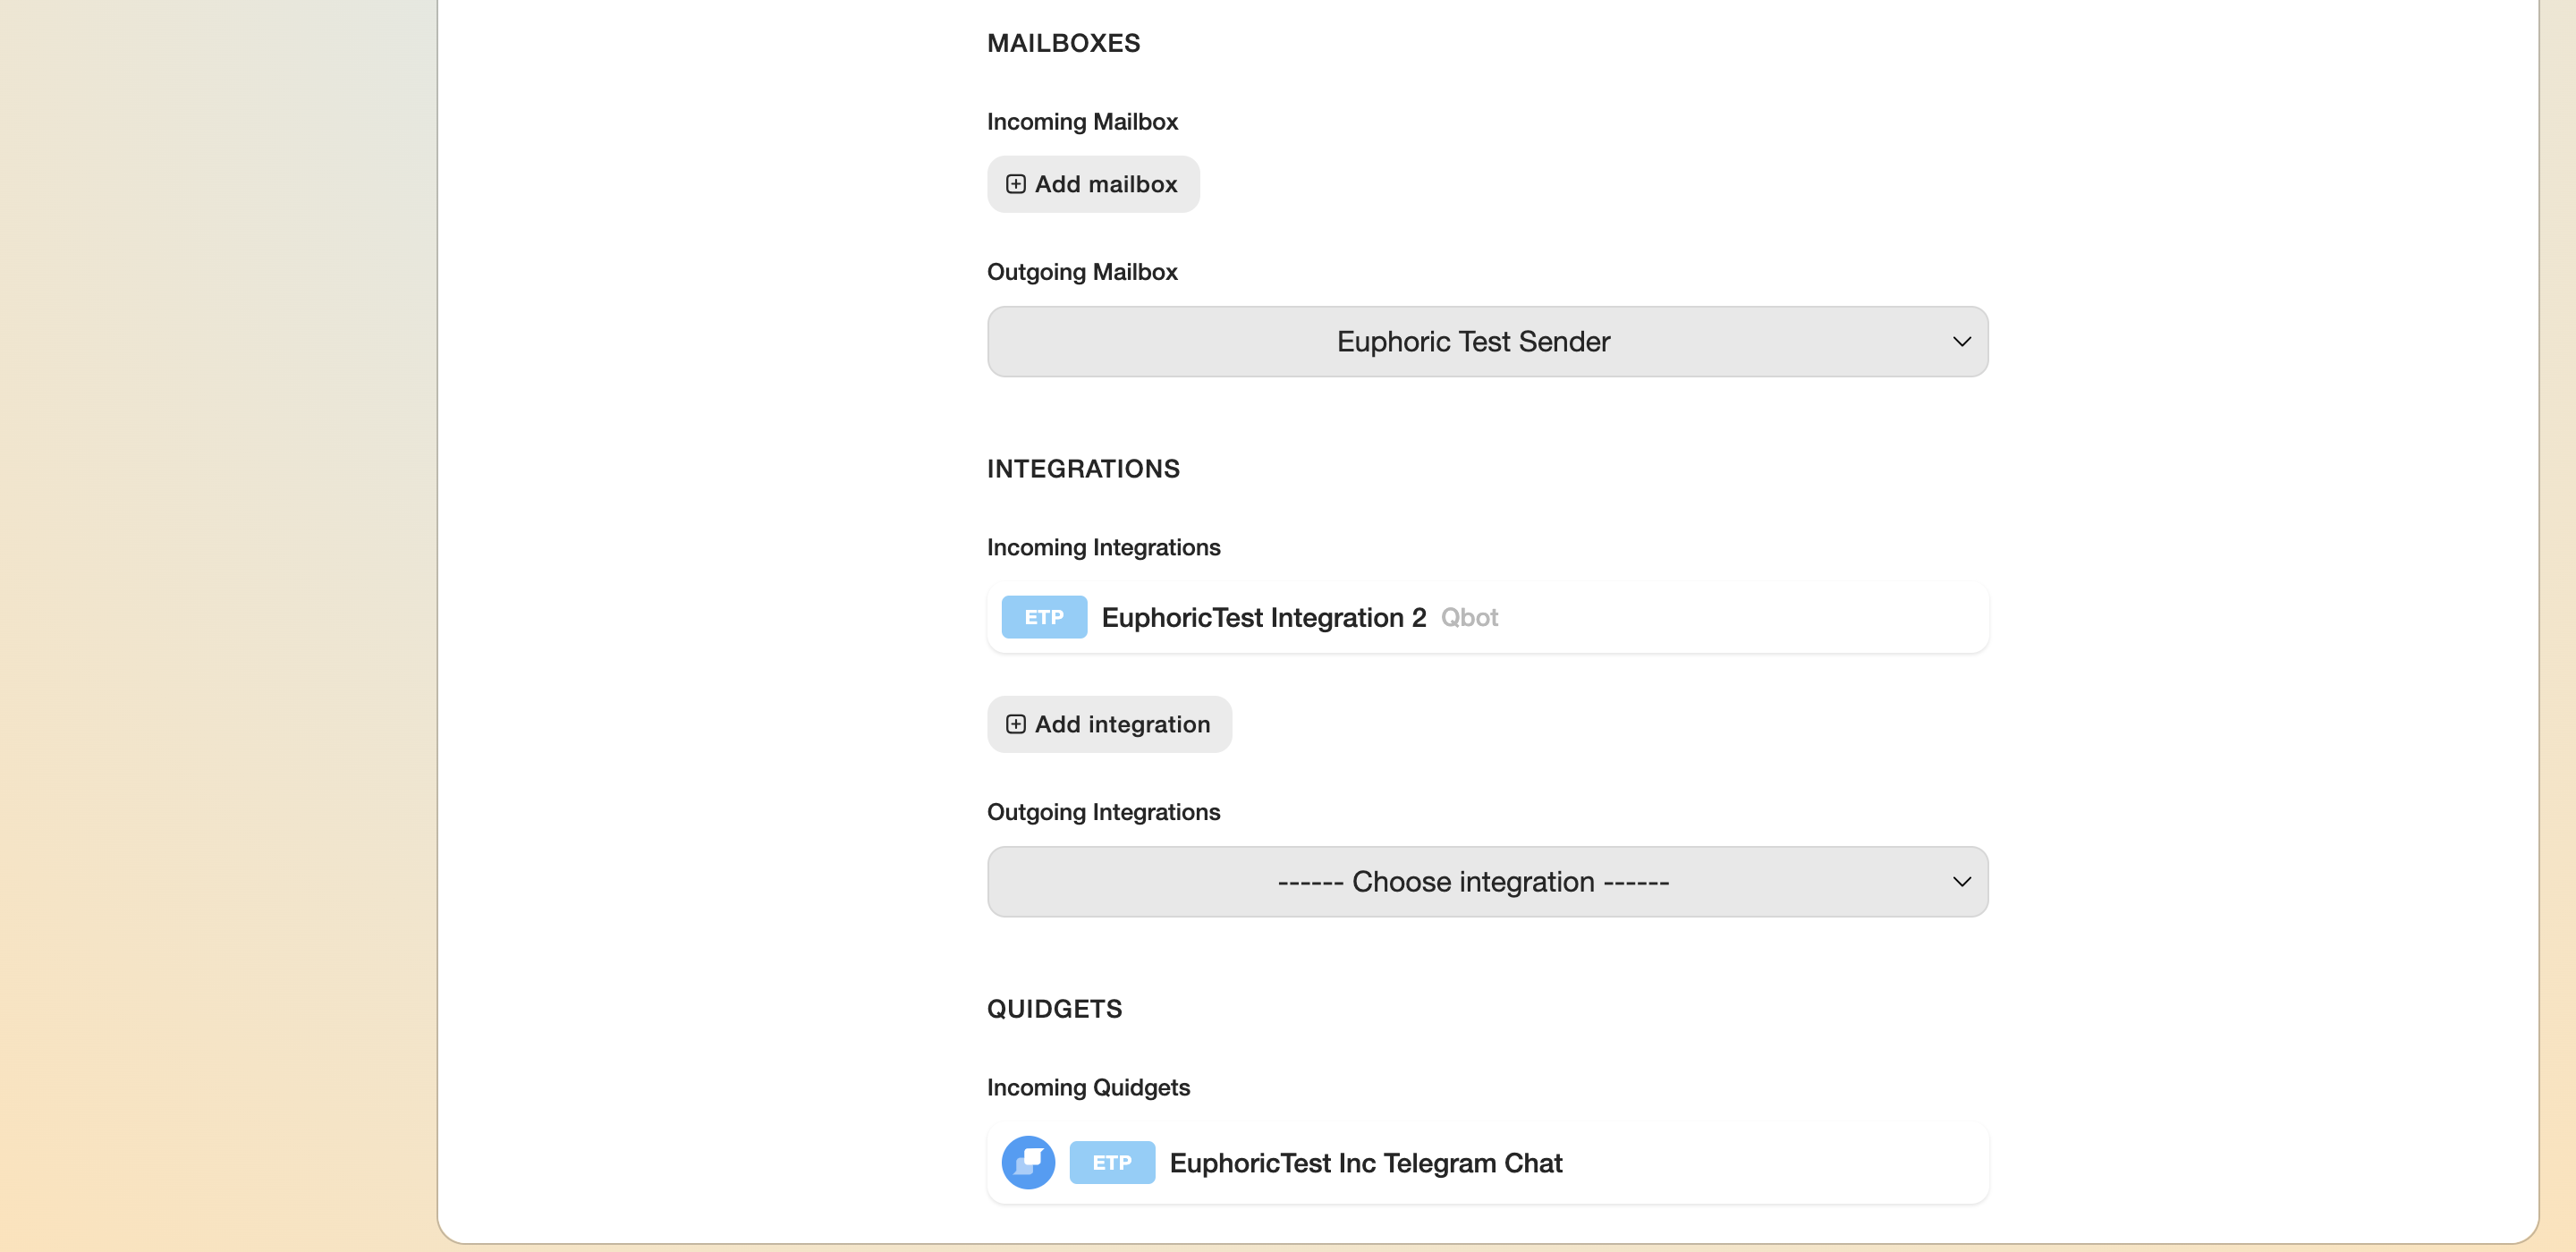
2. Mailboxes
2.1. Incoming mailboxes. Adding a new address for all new incoming emails from customers.
2.2. Outgoing mailbox. Selecting an email address used by agents to write to customers from.
3. Integrations
Communication channels. Allows integrating chats and voice channels from messengers.
3.1. Incoming integrations. Adding an incoming channel for connection with users.
3.2. Outgoing integrations. Selecting an outgoing user connection channel.
4. Quidgets
Built-in chat interfaces on our clients’ websites.
4.1. Incoming Quidgets. Chat interfaces that will send data to QCRM.
4.2. Outgoing Quidgets. Chat interfaces that will receive data from QCRM.
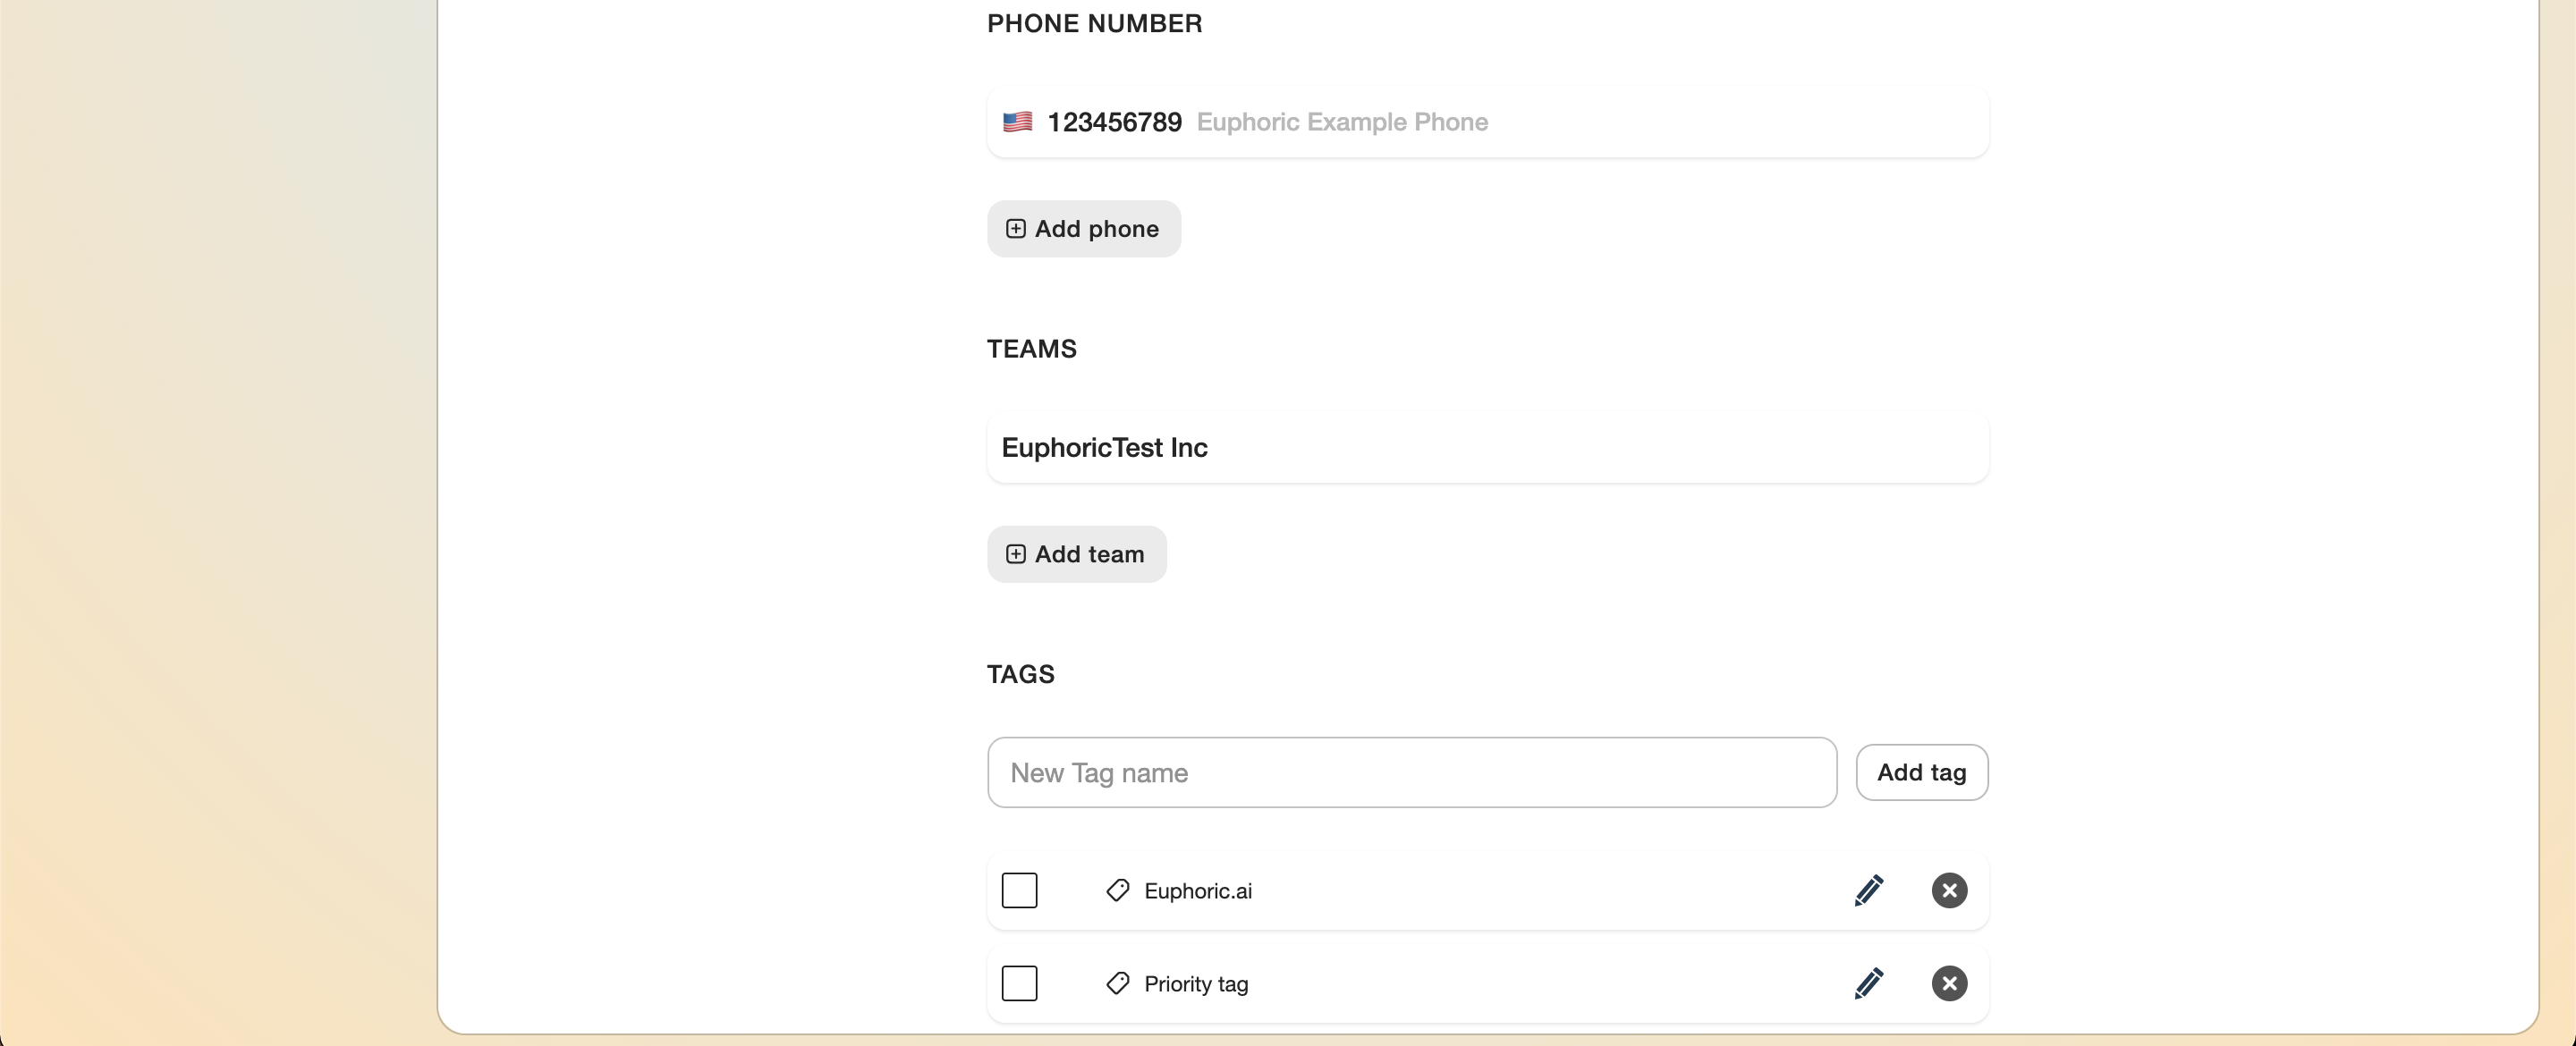
5. Phone Number
Users with leader access to the Team can edit phone numbers for receiving and making customer calls.
6. Teams
By using Teams on the left side of the screen, a team can be assigned.
7. Tags
7.1. You can add a new tag by entering a custom tag name and clicking Add tag.
7.2. Edit the added tags. The name can be edited, united under one name or deleted.
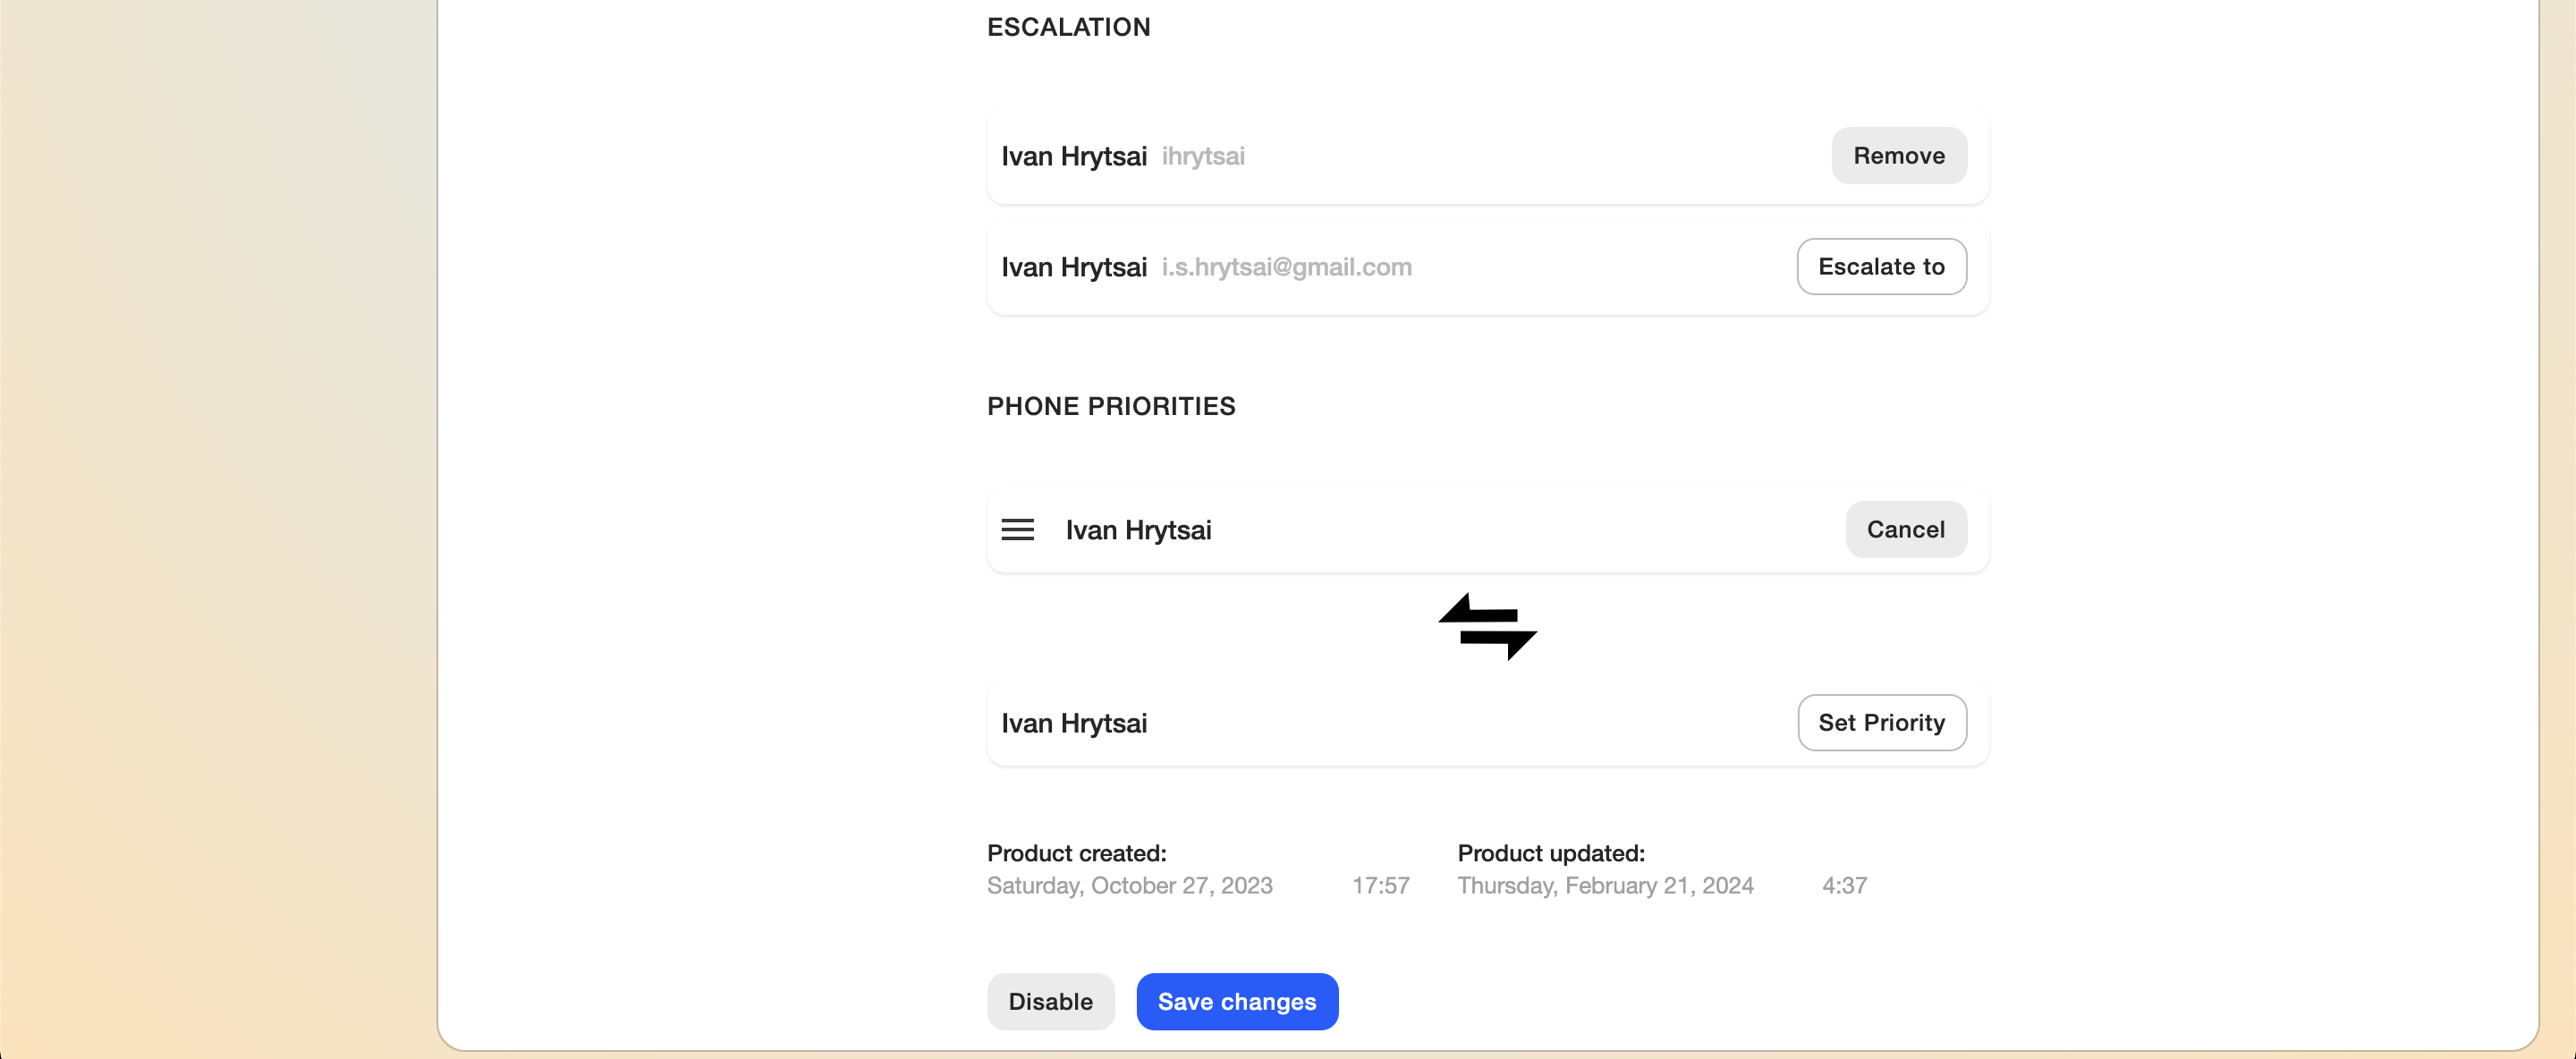
8. Escalation
When particular users are added to the Escalation/Vendor list, their names will be available for escalation in the tickets, associated with this product. They will receive a copy of the ticket correspondence thread to their email once a support agent escalates a certain ticket.
9. Phone priorities
Setting up the priority of the calls for a particular product. The higher the priority is — the more incoming calls there are. It is especially useful for segmenting the agents while supporting a product in different languages.
10. Status
Information about when the product was added and last modified.
The Save and Disable buttons can be found at the end of the list. A disabled product is automatically transferred to the disabled products list.